VRC
In order to use VRC with Audio for VATSIM, download the latest version of VRC and either the Audio for VATSIM standalone client or the VectorAudio client.
Step 1: Download and install the latest version of VRC.
Step 2: Download and install the Audio for VATSIM standalone client or the VectorAudio client.
Step 3: Connect to the network using VRC in the normal way.
Step 4: IMPORTANT! Set your communications panel as shown in the following screenshot. Ensure that your Vox Server and Vox Channel fields are blank. Additionally, only check the PRIM, TX, and RX boxes.

Step 5: Launch the Audio for VATSIM or VectorAudio software.
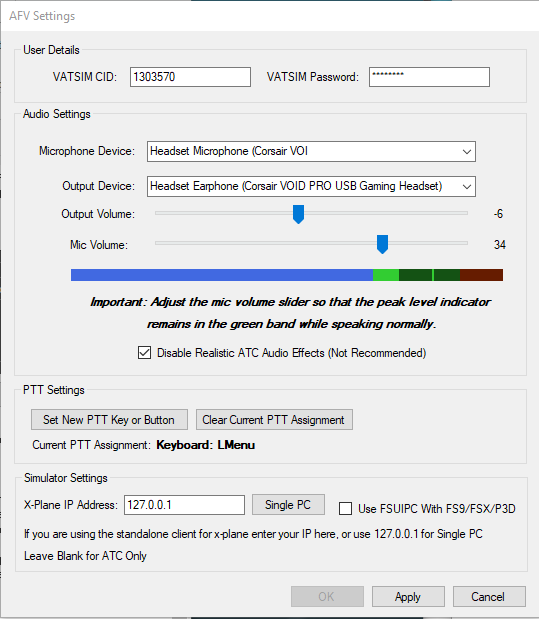
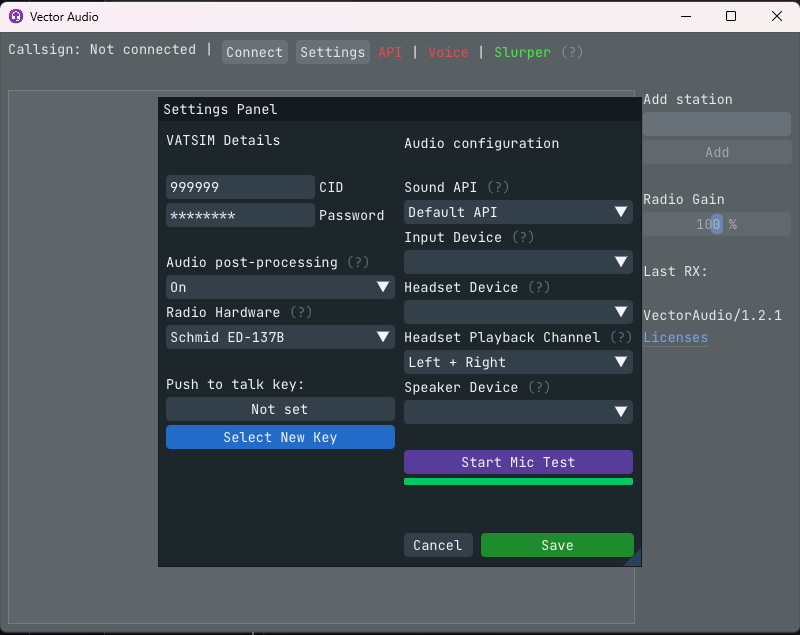
The first time you run the audio client, open the settings window and calibrate your microphone. When talking, the bar should be bouncing into the green band. If it does not, make sure you increase or decrease your mic volume using the mic volume slider.
AFV Client Settings:
VectorAudio Client Settings:
Don't forget to assign a push to talk key!
For further information refer to Section 6: Controlling with AFV in the Audio for VATSIM Manual linked on the top left of this page.
vATIS for AFV is available here